nvidia相机插件“nvv4l2camerasrc”目前只支持UYVY格式 然而使用的相机是GRAY8格式,需要扩展nvv4l2camerasrc格式
2. 参考12_camera_v4l2_cuda尝试运行样例来捕获帧,并将其移植到nvv4l2camerasrc插件 sample如下: /usr/src/jetson_multimedia_api/samples/12_camera_v4l2_cuda
3. 丢帧问题目前能够使用 v4l2src gstreamer插件捕获帧。 但是性能有些问题,导致帧丢失。 已经确定帧丢失发生在我的管道的开始,所以基本上是在源。
希望通过使用 nvv4l2camerasrc 插件,可以利用NVMM缓冲区有一些性能提高,也能够增加v4l2设备在插件中使用的队列缓冲区大小。
(1)在运行中检查是否能达到目标帧数:
gst-launch-1.0 v4l2src ! video/x-raw,format=GRAY8,width=_W_,height=_H_,framerate=_FR_ ! nvvidconv ! video/x-raw(memory:NVMM),format=I420 ! fpsdisplaysink text-overlay=0 video-sink=fakesink sync=0 -v如果能在管道中获得足够的性能,可能不需要定制nvv4l2camerasrc。 自定义消除了一个从CPU缓冲区到NVMM缓冲区的内存副本。 如果想减少CPU负载,可以试一试。
(2)采集异常log
Setting pipeline to PAUSED … Pipeline is live and does not need PREROLL … /GstPipeline:pipeline0/GstFPSDisplaySink:fpsdisplaysink0/GstFakeSink:fakesink0: sync = false Setting pipeline to PLAYING … New clock: GstSystemClock /GstPipeline:pipeline0/GstV4l2Src:v4l2src0.GstPad:src: caps = video/x-raw, format=(string)GRAY8, width=(int)4208, height=(int)3120, framerate=(fraction)26/1, colorimetry=(string)2:4:7:1, interlace-mode=(string)progressive /GstPipeline:pipeline0/GstCapsFilter:capsfilter0.GstPad:src: caps = video/x-raw, format=(string)GRAY8, width=(int)4208, height=(int)3120, framerate=(fraction)26/1, colorimetry=(string)2:4:7:1, interlace-mode=(string)progressive /GstPipeline:pipeline0/Gstnvvconv:nvvconv0.GstPad:src: caps = video/x-raw(memory:NVMM), width=(int)4208, height=(int)3120, framerate=(fraction)26/1, interlace-mode=(string)progressive, format=(string)NV12 /GstPipeline:pipeline0/GstCapsFilter:capsfilter1.GstPad:src: caps = video/x-raw(memory:NVMM), width=(int)4208, height=(int)3120, framerate=(fraction)26/1, interlace-mode=(string)progressive, format=(string)NV12 /GstPipeline:pipeline0/GstFPSDisplaySink:fpsdisplaysink0.GstGhostPad:sink.GstProxyPad:proxypad0: caps = video/x-raw(memory:NVMM), width=(int)4208, height=(int)3120, framerate=(fraction)26/1, interlace-mode=(string)progressive, format=(string)NV12 /GstPipeline:pipeline0/GstFPSDisplaySink:fpsdisplaysink0/GstFakeSink:fakesink0.GstPad:sink: caps = video/x-raw(memory:NVMM), width=(int)4208, height=(int)3120, framerate=(fraction)26/1, interlace-mode=(string)progressive, format=(string)NV12 /GstPipeline:pipeline0/GstFPSDisplaySink:fpsdisplaysink0.GstGhostPad:sink: caps = video/x-raw(memory:NVMM), width=(int)4208, height=(int)3120, framerate=(fraction)26/1, interlace-mode=(string)progressive, format=(string)NV12 /GstPipeline:pipeline0/GstCapsFilter:capsfilter1.GstPad:sink: caps = video/x-raw(memory:NVMM), width=(int)4208, height=(int)3120, framerate=(fraction)26/1, interlace-mode=(string)progressive, format=(string)NV12 /GstPipeline:pipeline0/Gstnvvconv:nvvconv0.GstPad:sink: caps = video/x-raw, format=(string)GRAY8, width=(int)4208, height=(int)3120, framerate=(fraction)26/1, colorimetry=(string)2:4:7:1, interlace-mode=(string)progressive /GstPipeline:pipeline0/GstCapsFilter:capsfilter0.GstPad:sink: caps = video/x-raw, format=(string)GRAY8, width=(int)4208, height=(int)3120, framerate=(fraction)26/1, colorimetry=(string)2:4:7:1, interlace-mode=(string)progressive gst_nvvconv_transform: NvBufferTransform not supported ERROR: from element /GstPipeline:pipeline0/GstV4l2Src:v4l2src0: Internal data stream error. Additional debug info: gstbasesrc.c(3055): gst_base_src_loop (): /GstPipeline:pipeline0/GstV4l2Src:v4l2src0: streaming stopped, reason error (-5) Execution ended after 0:00:00.141547135 Setting pipeline to PAUSED … Setting pipeline to READY … Setting pipeline to NULL … Freeing pipeline …(3)更换视频格式 I420替换NV12。
用I420可以采集视频,但不是预期的26帧,而是21帧。 可能是从GRAY8到I420发生了格式转换导致的。
源代码是4208x312026fps。 由于分辨率高于4K,建议定制nvv4l2camerasrc插件。
4. 运行定制nvv4l2camerasrc修改了插件以支持GRAY8格式。 然而,我遇到了一些奇怪的性能问题
gst-launch-1.0 v4l2src ! “video/x-raw, format=(string)GRAY8, width=(int)4208, height=(int)3120, framerate=(fraction)26/1” ! fpsdisplaysink video-sink=fakesink text-overlay=false -e -v帧率是正常的26fps。
gst-launch-1.0 nvv4l2camerasrc bufapi-version=true ! “video/x-raw(memory:NVMM), format=(string)GRAY8, width=(int)4208, height=(int)3120, framerate=(fraction)26/1” ! fpsdisplaysink video-sink=fakesink text-overlay=false -e -v只有2fps。
5. 运行12_camera_v4l2_cuda sample试试12_camera_v4l2_cuda 看看运行示例时能否达到目标帧率
得到了下面的图像,帧率只有10fps。
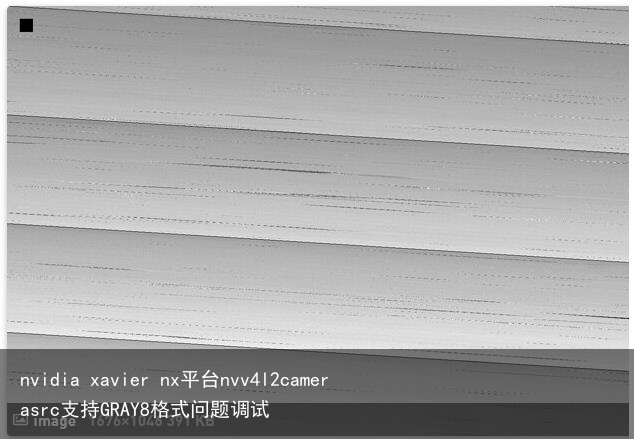
根据文档nvvidconv插件应该支持从GRAY8(NVMM)到I420(NVMM)的转换。 然而,当我使用管道做这个转换,总是报以下问题
st_nvvconv_transform: NvBufferTransform not supported12_camera_v4l2_cudaby GRAY8到I420的转换默认如下:
if (-1 == NvBufferTransform(ctx->g_buff[v4l2_buf.index].dmabuff_fd, ctx->render_dmabuf_fd, &transParams)) ERROR_RETURN(“Failed to convert the buffer”); if (ctx->cam_pixfmt == V4L2_PIX_FMT_GREY) { if(!nvbuff_do_clearchroma(ctx->render_dmabuf_fd)) ERROR_RETURN(“Failed to clear chroma”); }调用NvBufferGetParams()来获取pitch,width,height。 看起来分辨率4208×3120,硬件缓冲区没有相同的间距和宽度, 所以帧没有捕获和放入缓冲区正确。
这是否意味着DMA不能用于此分辨率的v4l2相机?
if (ctx->cam_pixfmt == V4L2_PIX_FMT_GREY && params.pitch[0] != params.width[0]) ctx->capture_dmabuf = false;对于我使用的分辨率,我得到 witdh = 4208 height = 3120 pitch = 4352 所以在我的例子中,它不使用DMA。为什么会这样呢? 通过手动修改宽度为4224在Raw2NvBuffer调用。所以显然宽度是64的倍数?为什么会这样呢? 无论如何,这是没有使用DMA,,因为这会导致过低的帧率。为什么会这样呢?
原因如下:
这是硬件DMA缓冲区的约束。 对于4208×3120,它的缓冲区在4352×3120中,有效数据在4208×3120中。
应该使用pitch=width分配DMA缓冲区。如果源程序只支持4208×3120,那么您将需要捕获到CPU缓冲区并调用Raw2NvBuffer。
7. 间距值设置间距值对齐到256,所以320→512,640→768,4208→4352。

